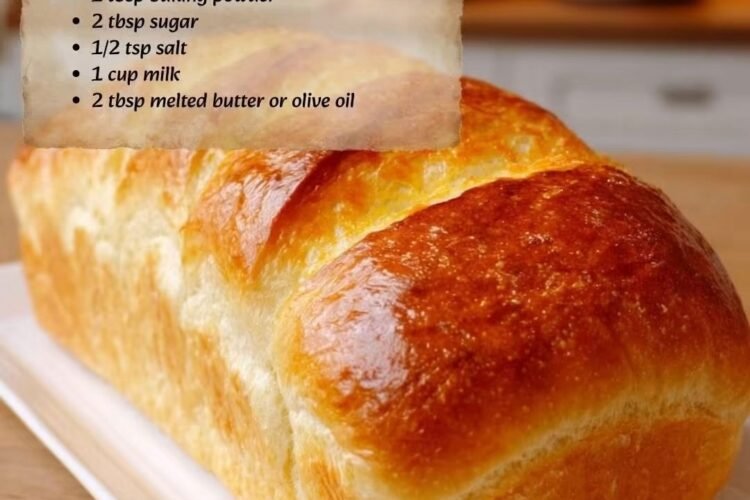
There’s something special about the smell of homemade bread filling the kitchen. It makes an ordinary meal feel a little more comforting, and a warm slice spread with butter can be hard to beat. The problem is that traditional homemade bread often requires yeast, kneading, rising, and plenty of waiting.
That’s exactly why this 20-Minute Homemade Bread is such a useful recipe to keep in your back pocket.
This isn’t a traditional yeast loaf. Instead, it’s a simple quick bread made with baking powder, so there’s no yeast activation or rising time involved. You mix a handful of everyday ingredients, transfer the batter to a loaf pan, and bake until the top is beautifully golden.
The result is a soft, tender loaf with a lightly crisp exterior and a comforting homemade flavor. It’s perfect when you need bread quickly for breakfast, dinner, soup, stew, or an afternoon snack.
Even if you’ve never baked bread before, this recipe is incredibly approachable. There’s no complicated technique and no special equipment required. Just remember the most important rule: don’t overmix the batter.
Why You’ll Love This 20-Minute Bread
There are plenty of reasons this quick homemade bread deserves a place in your recipe collection.
No yeast required: You don’t need to wait for dough to rise.
Simple ingredients: Most of the ingredients are probably already sitting in your pantry or refrigerator.
Very little hands-on work: The batter comes together in just a few minutes.
Beginner-friendly: There’s no kneading or complicated bread-making technique.
Easy to customize: Make it sweet, savory, cheesy, herby, or nutty depending on how you plan to serve it.
Perfect for busy days: When you realize you’re out of bread, this recipe can come to the rescue.
Ingredients You’ll Need
2 cups all-purpose flour
All-purpose flour creates a tender loaf with a soft, satisfying crumb. For the most consistent results, measure your flour carefully. If using measuring cups, spoon the flour into the cup and level it rather than packing it down.
1 tablespoon baking powder
Baking powder is the leavening agent that gives this quick bread its lift. Make sure yours is reasonably fresh for the best rise.
2 tablespoons granulated sugar
Sugar adds a subtle sweetness and helps the crust develop a beautiful golden color. If you’re making a savory version, you can reduce or omit it.
1/2 teaspoon salt
Salt balances the flavors and keeps the bread from tasting flat.
1 cup milk
Whole milk or 2% milk works well. You can also use an unsweetened dairy-free milk if needed.
2 tablespoons melted unsalted butter or olive oil
Melted butter adds richness and a classic homemade flavor. Olive oil works well too and gives the bread a slightly different character.
Extra butter or oil is useful for greasing the loaf pan.
How to Make 20-Minute Homemade Bread
1. Prepare the oven and loaf pan
Start by preheating your oven to 375°F (190°C).
Lightly grease a standard 9×5-inch loaf pan with butter or oil. You can also line the pan with parchment paper, leaving a little overhang along the long sides. This makes removing the finished loaf especially easy.
Preparing the pan before mixing the batter is important because the baking powder starts working once the wet and dry ingredients come together.
2. Combine the dry ingredients
Add the flour, baking powder, sugar, and salt to a large mixing bowl.
Whisk everything together until evenly combined.
This step may seem simple, but it matters. You want the baking powder distributed throughout the flour so the loaf rises evenly instead of developing pockets with too much or too little leavening.
3. Mix the wet ingredients
In a separate bowl or large measuring cup, combine the milk with the melted butter or olive oil.
If you’ve melted the butter, allow it to cool slightly before combining it with the milk. You don’t want the butter extremely hot.
Give the mixture a quick whisk.
4. Combine wet and dry ingredients
Pour the milk mixture into the bowl with the dry ingredients.
Using a wooden spoon or rubber spatula, gently stir everything together.
This is where you want to be careful. Do not overmix.
Stir only until the ingredients are mostly combined. A few small lumps or tiny streaks of flour are completely fine.
Overmixing can develop too much gluten, which may leave your finished bread dense, chewy, or tough rather than soft and tender.
5. Transfer the batter to the pan
Scrape the batter into your prepared loaf pan.
Use your spatula to spread the batter into an even layer.
If you want, lightly brush the surface with a little milk before baking. This can help create a pleasant golden finish.
For a slightly sweeter loaf, sprinkle a small amount of sugar over the top.
6. Bake
Place the loaf pan in the preheated oven and bake for approximately 18 to 22 minutes.
Keep an eye on the bread toward the end of the baking time. The exact timing can vary depending on your oven and the pan you use.
The bread should be lightly golden on top, and a wooden toothpick or skewer inserted into the center should come out clean or with just a few moist crumbs attached.
7. Cool briefly
Remove the bread from the oven and allow it to cool in the pan for about 5 minutes.
This short resting period gives the crumb time to set and makes the loaf easier to remove without breaking apart.
8. Slice and serve
If you used parchment paper, carefully lift the bread from the pan using the overhang and transfer it to a wire rack.
Let it cool further before slicing if you want cleaner slices.
Of course, if you simply can’t resist a warm piece of homemade bread, slicing it while it’s still warm is perfectly acceptable. Add a little butter and enjoy.
Tips for the Best Quick Bread
Check your baking powder
Fresh baking powder is important because it provides the lift this bread needs. If your baking powder has been sitting in the pantry for a very long time, the bread may not rise properly.
Don’t overmix
This is probably the most important tip in the entire recipe. Once the wet and dry ingredients are combined, stop stirring as soon as the flour is incorporated.
A slightly lumpy batter is much better than an overworked one.
Measure flour correctly
Too much flour can make the bread heavy and dry. Spoon flour into your measuring cup and level the top with the back of a knife instead of scooping directly from the bag.
Don’t overbake
Quick bread can become dry if it stays in the oven too long. Start checking around the 18-minute mark, especially if your oven tends to run hot.
Easy Variations
One of the best things about this basic bread recipe is how easily you can change the flavor.
Garlic Herb Bread
For a savory loaf, reduce or omit the sugar and add garlic powder along with chopped rosemary, thyme, or chives.
Cheesy Bread
Stir about 1/4 cup of grated Parmesan or another flavorful cheese into the batter. You can also sprinkle a little cheese over the top before baking.
Sweet Cinnamon Bread
Add a little cinnamon and vanilla extract to the batter for a lightly sweet loaf that’s delicious with butter.
Cranberry Nut Bread
Fold in about 1/2 cup of dried cranberries and chopped walnuts or pecans for a breakfast-friendly variation.
Chocolate Chip Bread
For a simple treat, gently fold chocolate chips into the batter after combining the wet and dry ingredients.
How to Serve Homemade Quick Bread
This bread is versatile enough to serve throughout the day.
For breakfast, serve warm slices with butter, honey, jam, or fruit preserves.
At lunch or dinner, pair it with soups, stews, chili, roasted vegetables, or hearty casseroles. The tender crumb is excellent for soaking up flavorful sauces and broths.
You can also toast leftover slices and serve them with scrambled eggs or use them as the base for a quick snack.
How to Store Homemade Bread
Allow the bread to cool completely before storing it.
Wrap the loaf tightly in plastic wrap or aluminum foil, or place it inside an airtight container. At room temperature, it should stay fresh for approximately 2 to 3 days.
For longer storage, slice the cooled bread and place the slices in a freezer-safe bag or airtight container. Freeze for up to 3 months.
Freezing individual slices is especially convenient because you can remove only what you need.
To reheat, toast individual slices directly from frozen. You can also warm a larger portion in a 300°F (150°C) oven wrapped loosely in foil for about 10 to 15 minutes.
Frequently Asked Questions
Why did my bread turn out dense?
The most common reason is overmixing. Quick breads should be stirred gently and only until the ingredients are combined. Old baking powder can also prevent the loaf from rising properly.
Can I use a different type of milk?
Yes. Whole milk, 2%, skim milk, and many unsweetened dairy-free alternatives can work. The texture may vary slightly depending on the milk you choose.
Can I replace butter with oil?
Absolutely. Olive oil works well, and a neutral-flavored oil can also be used if you prefer a more neutral taste.
How can I tell when the bread is done?
The top should look golden brown, and a toothpick inserted into the center should come out clean or with a few moist crumbs. The top should also spring back gently when pressed.
Can I make this recipe gluten-free?
You can try using a 1:1 gluten-free baking flour blend designed to replace all-purpose flour. Choose a blend that contains xanthan gum if recommended by the manufacturer, and verify that all other ingredients meet your dietary requirements.
Final Thoughts
When you want homemade bread without spending hours in the kitchen, this 20-Minute Homemade Bread is an easy solution. It skips yeast, kneading, and rising while still giving you a warm loaf with a tender interior and golden crust.
Keep the recipe simple for everyday meals, or customize it with herbs, cheese, cinnamon, dried fruit, nuts, or chocolate chips. Once you see how quickly it comes together, you may find yourself making it whenever you need a fresh loaf in a hurry.
Recipe at a Glance
Prep Time: 5 minutes
Bake Time: 18–22 minutes
Total Time: About 20–25 minutes
Servings: 8
Calories: Approximately 220 per serving
Approximate Nutrition Per Serving
- Calories: 220 kcal
- Protein: 6g
- Carbohydrates: 35g
- Fat: 7g
- Fiber: 2g
- Sodium: 300mg
Nutrition information is an estimate and may vary depending on the ingredients and brands used.